
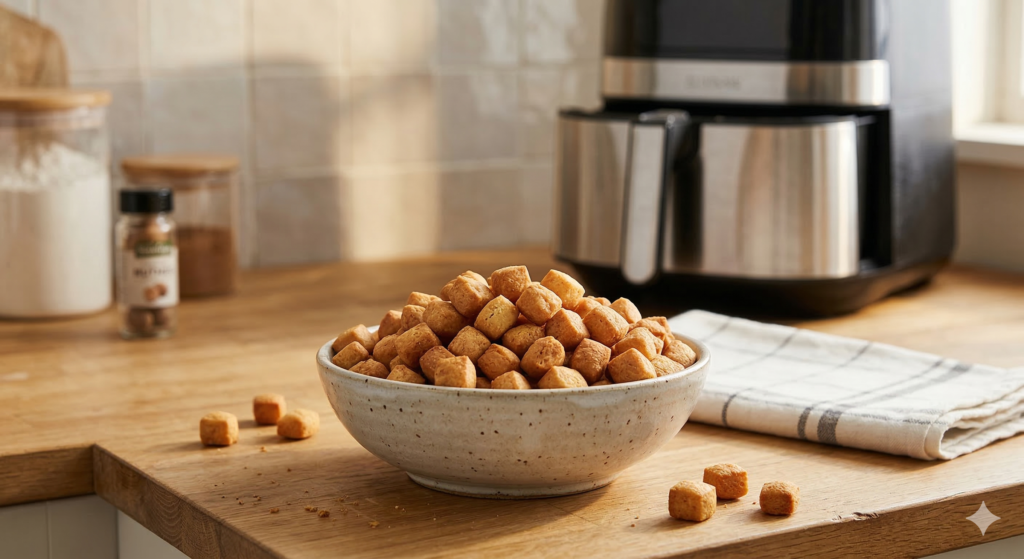
Chin-Chin is the quintessential West African crunchy snack—a fried dough traditionally enjoyed at parties, during the holidays, or as a daily treat. In this air-fried version, we maintain the classic nutmeg-infused, milky flavor profile while achieving a crisp, biscuit-like snap without the heavy oil saturation of deep frying. This guide on How to Make Air Fried Chin Chin will help you create the perfect snack.
Section: “The Strategy for Success”
The Goal (The Promise): This guide ensures you get a snack that is uniform in crunch, golden in color, and light on the palate, successfully mimicking the texture of the traditional fried version using 90% less oil.
The Common Pitfall (The Risk): We’ve all seen air-fried dough that is either rock-hard and tooth-breaking or pale, doughy, and bland. Without the heat of oil to quickly seal the exterior, the dough can dry out before it crisps.
The Method (The Teacher): We will use the “Cold-Butter Rub” Technique. By rubbing cold butter into the flour until it resembles breadcrumbs, we coat the flour particles in fat. This inhibits excessive gluten development and creates tiny air pockets that expand in the air fryer, ensuring a “short” (tender) crunch rather than a hard one.
Subheading: “How to Make Air Fried Chin Chin Perfectly Every Time”
To achieve the best results, follow this comprehensive guide on How to Make Air Fried Chin Chin, ensuring a delightful snacking experience.
Table: “At a Glance”
| Prep | Cook | Total | Servings | Skill Level |
| 30 Mins | 15 Mins (per batch) | 45 Mins | 6-8 | Beginner |
Section: “Why This Recipe Works”
Lipid Barrier: Rubbing fat into the flour before adding liquid prevents the water from over-activating the gluten, which keeps the chin-chin from becoming “bready”.
Nutmeg & Milk Synergy: The combination of whole milk and aromatic nutmeg provides a rich, “fatty” mouthfeel that tricks the brain into thinking the snack was deep-fried in oil.
Convection Crisp: Using an air fryer at a moderate temperature allows the high-velocity air to remove moisture from the dough evenly, resulting in a consistent snap throughout the center.
Section: “The Ingredients (Teacher’s Notes)”
All-Purpose Flour: 3 Cups (375g).
💡 (The Teacher’s ‘Why’): This provides the right protein content (10-12%) to give the snack structure without making it as tough as bread.
🚫 (The Risk Manager’s ‘Why Not’): Do not use Bread Flour; the high gluten content will turn your chin-chin into hard “stones”.
Unsalted Butter (Cold): 1/2 Cup (115g).
💡 (The Teacher’s ‘Why’): Cold fat creates the “shortness” or crumbly texture.
🚫 (The Risk Manager’s ‘Why Not’): Do not use melted butter. Melted butter mixes too thoroughly with flour, resulting in a greasy, heavy dough that won’t crisp up in the air fryer.
Granulated Sugar: 1/2 Cup (100g).
💡 (The Teacher’s ‘Why’): Sugar caramelizes under the air fryer’s heating element, providing the golden-brown color.
Whole Milk: 1/4 to 1/2 Cup (60-120ml).
💡 (The Teacher’s ‘Why’): The fats in whole milk add richness and help bind the dough without making it sticky.
Nutmeg: 1 Teaspoon (Freshly grated).
💡 (The Teacher’s ‘Why’): Nutmeg contains essential oils that are released during the “toasting” phase of air frying.
Section: “Instructions (The ‘Why/Why Not’ Core)”
Phase 1: The Dry Mix
The Step: Whisk the flour, sugar, nutmeg, and a pinch of salt in a large bowl.
💡 (The Teacher’s ‘Why’): This ensures the leavening and flavors are distributed perfectly before the fat is introduced.
🚫 (The Risk Manager’s ‘Why Not’): Do not skip the salt; it is the “flavor bridge” that makes the sugar and nutmeg pop.
Phase 2: The Rub (Crucial Step)
The Step: Add the cold, cubed butter. Use your fingertips to rub the butter into the flour until it looks like coarse breadcrumbs.
💡 (The Teacher’s ‘Why’): This “pilaf-style” approach for dough ensures every flour particle is “waterproofed” by fat.
🚫 (The Risk Manager’s ‘Why Not’): Do not use a food processor for too long. If the butter gets too warm, the dough will become a solid mass rather than a crumbly base.
Phase 3: The Bind
The Step: Gradually add milk, 1 tablespoon at a time, kneading gently until a stiff, non-sticky dough forms.
💡 (The Teacher’s ‘Why’): We are looking for “controlled hydration”.
🚫 (The Risk Manager’s ‘Why Not’): Do not “drown” the dough. If it’s too soft, the pieces will merge back together in the air fryer.
Phase 4: The Cut
The Step: Roll the dough to 1/2 inch thickness and cut into small 1cm squares.
💡 (The Teacher’s ‘Why’): Small, uniform pieces ensure the air can circulate around each cube evenly.
Phase 5: The Air-Fry
The Step: Arrange in a single layer in the air fryer basket. Cook at 160°C (320°F) for 12-15 minutes, shaking the basket every 4 minutes.
💡 (The Teacher’s ‘Why’): Shaking ensures all sides are exposed to the “trapped steam” and heat.
🚫 (The Risk Manager’s ‘Why Not’): DO NOT OPEN THE AIR FRYER CONSTANTLY. Every time you check, the heat escapes, and the centers won’t cook.
A Quick Note: This page contains affiliate links. This means if you click a link and make a purchase, I may receive a small commission at no extra cost to you. This helps support the website and allows me to keep creating free, delicious recipes for you. I only recommend products I personally use and truly believe in! For this recipe I recommend a multi-functional air fryer. Models made by Russel Hobbs, Ninja and Cosori are all reliable. The Cosori 9-in-1 TurboBlaze Air Fryer 6 Qt, Premium Ceramic Coating, 90°–450° represents the best value and I highly recommend it. You can get it here: https://amzn.to/4bkk5L0
Section: “The ‘Risk-Free Q&A’ (Troubleshooting)”
Analysis 1: “The chin-chin is hard enough to break a tooth.”
The Diagnosis: You over-kneaded the dough, developing too much gluten, or your heat was too low for too long, essentially “dehydrating” the dough into a brick.
The Solution: Next time, stop kneading the second the dough comes together. To fix the current batch, serve with a hot beverage for dipping.
Analysis 2: “The pieces are stuck together in a clump.”
The Diagnosis: The dough was too wet, or the basket was overcrowded.
The Solution: Dust the cut pieces with a little flour before putting them in the air fryer to “seal” the edges.
Analysis 3: “They are burnt on the outside but raw inside.”
The Diagnosis: The temperature was too high.
The Solution: Reduce the heat to 150°C for the next batch and cook for 2-3 minutes longer.
Section: Notes & Substitutions
Vegan Option: Use cold coconut oil (solid state) or vegan butter and coconut milk.
Flavor Twist: Add a teaspoon of cinnamon or lime zest for a modern profile.
Section: Make-Ahead & Storage
Storage: Store in an airtight container for up to 2 weeks.
Make-Ahead: You can cut the dough and freeze it in a single layer, then air-fry directly from frozen for 18-20 minutes.
Section: The “Best” Air-Fried Chin-Chin Recipe Card
Ingredients:
3 Cups All-Purpose Flour
1/2 Cup Cold Unsalted Butter (Cubed)
1/2 Cup Sugar
1 Tsp Nutmeg
1/4 Cup Whole Milk
1/2 Tsp Salt
Instructions:
Whisk dry ingredients (flour, sugar, nutmeg, salt).
Rub in cold butter until the mixture looks like breadcrumbs.
Add milk slowly and knead into a stiff dough.
Roll and Cut into 1cm cubes.
Air-Fry at 160°C (320°F) for 12-15 mins, shaking the basket every 4 mins until golden brown.
To effectively store air-fried Chin Chin, ensure it is kept in an airtight container, where it will maintain its quality for up to two weeks. For those planning ahead, the dough can be prepared in advance; simply cut it into the desired shape and freeze in a single layer. When ready to enjoy, air-fry directly from frozen, adjusting the cooking time to 18-20 minutes. This method allows for convenient and delightful snacking whenever desired, illustrating how to make air-fried Chin Chin with ease.